The world is leaping forward with giant strides, and the technological world is no exception. More and more companies are trying to find the fastest way to launch their apps that would run on iOS, Android, or any other mobile operating system without the slightest hitch.
Not so long ago, Expo was no way up for this task. It used to have quite a limited functionality, and some features didn’t even work properly. This open-source platform for creating applications has improved over time and now it can give you a much-needed boost to your mobile app project.
In case you’ve never tried to build an app with the help of Expo.io, or you weren’t fully satisfied with its old versions, it’s high time you changed your mind about it. Read on to find out how to start using Expo right away.
Expo Development Process
The main reason why you should start using Expo right now is its speed and ease of use. This tool will give you a competitive advantage on the market.
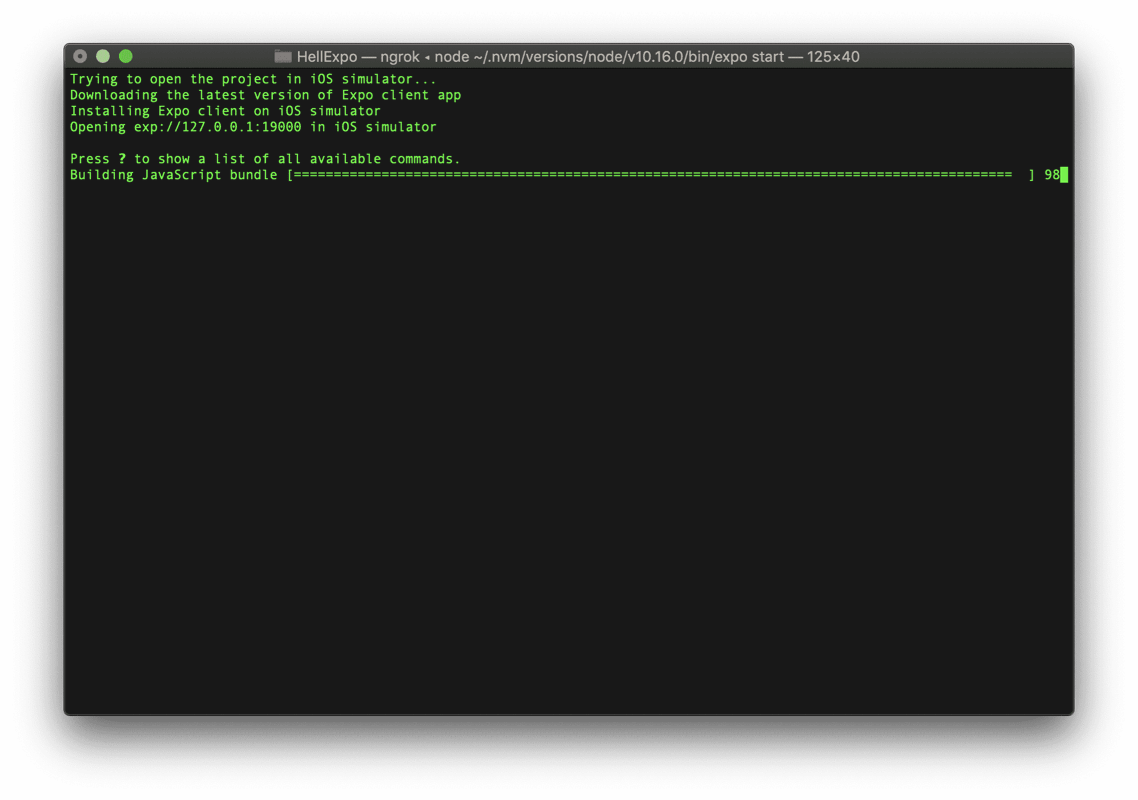
To speed up your development process when you are running an application on a real device, the only thing you need to do is to scan QR-Code from the terminal. In case you want to run the app on iOS Simulator or Android Emulators, use hotkeys.
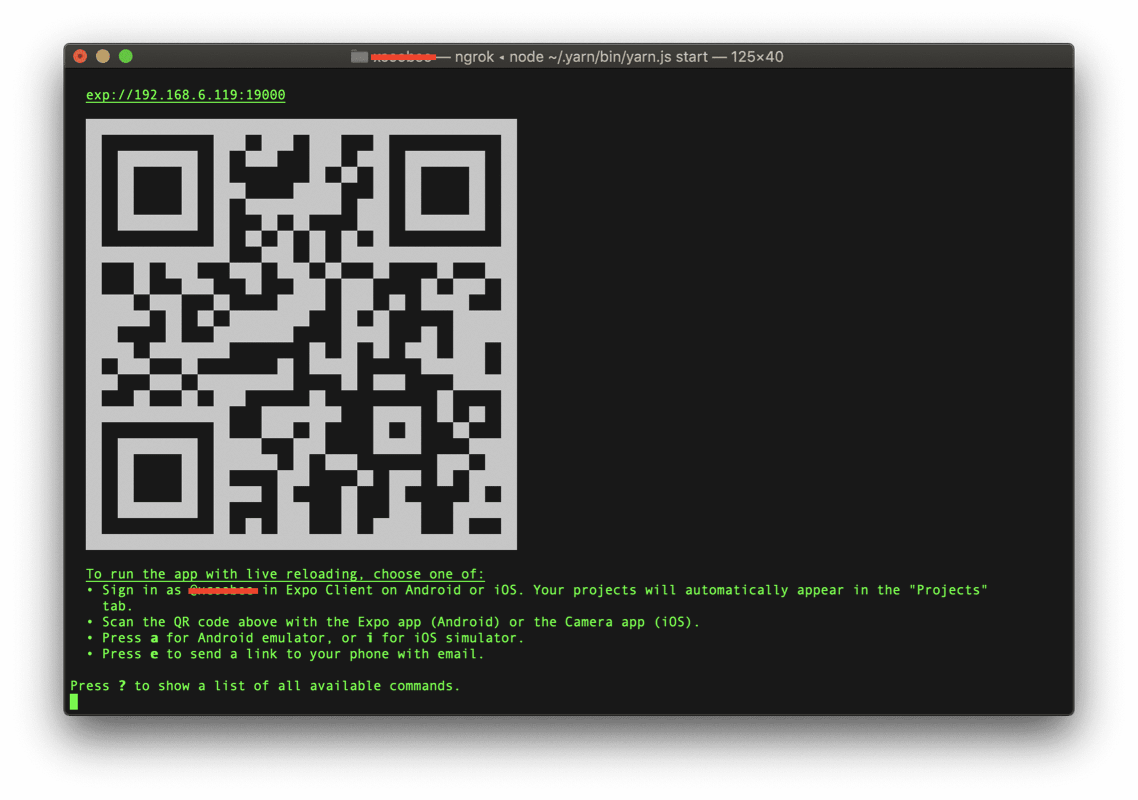
To invoke built-in Expo Developer Tools, you should press “D” in the terminal.
You can also use other shortcuts:
“I” — to run an application on iOS Simulator
“A” — to run an application on an Android Device or Emulator
“C” — to show a QR-Code to scan from a real device
“P” — to switch to production mode
“R” — to restart bundler
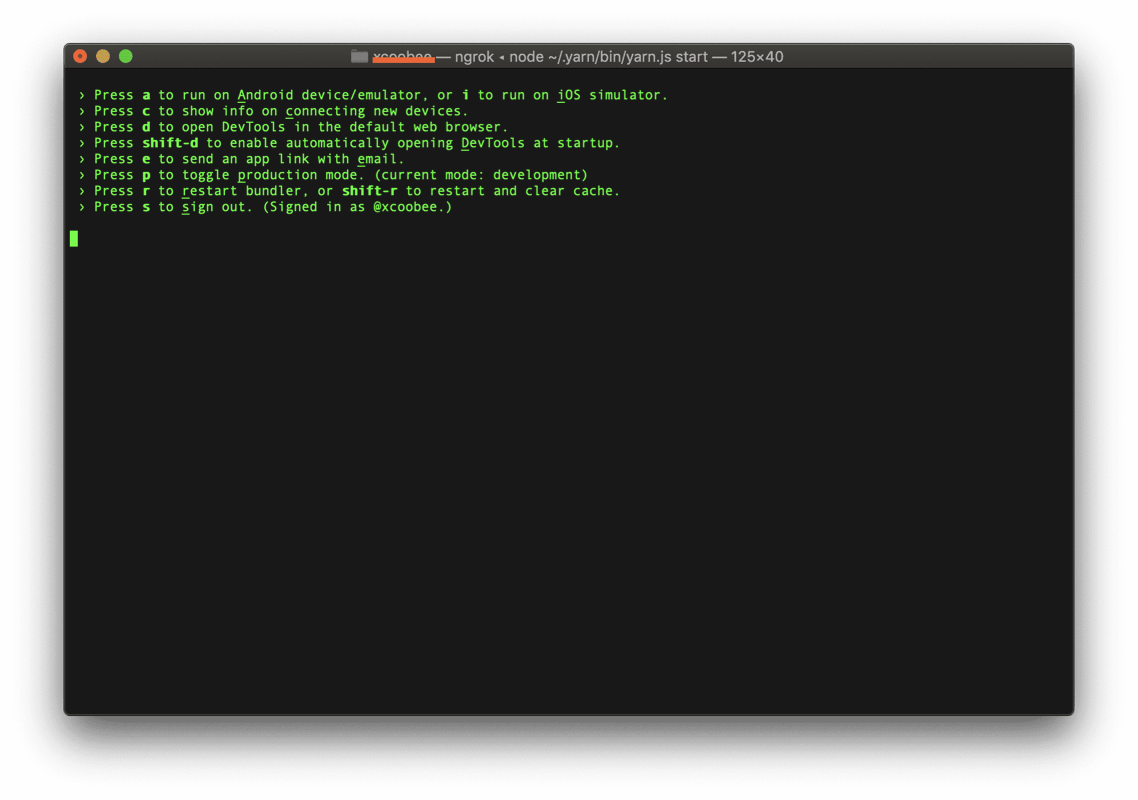
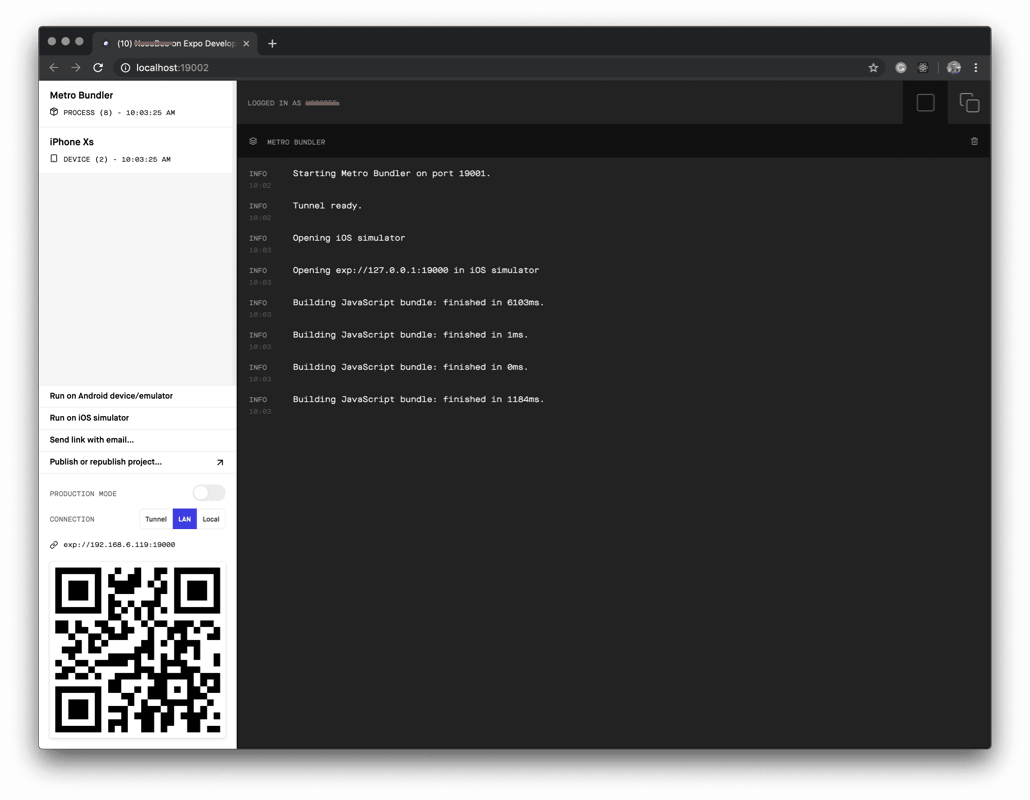
The same actions you can perform in the Expo Developer Tools window.
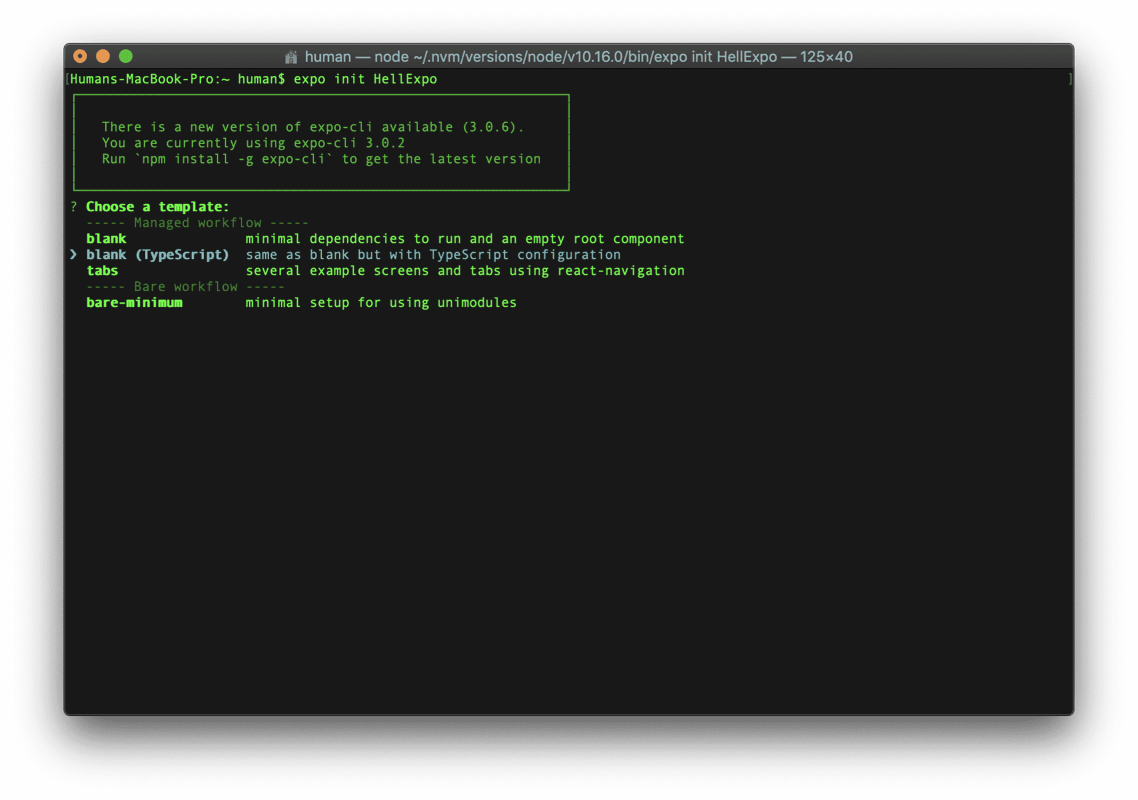
How to Init a Project?
There are a few options to initialize a project:
- You can use a specific template: “blank,” “tabs,” “bare-minimum,” set a package manager “yarn,” or “npm.”
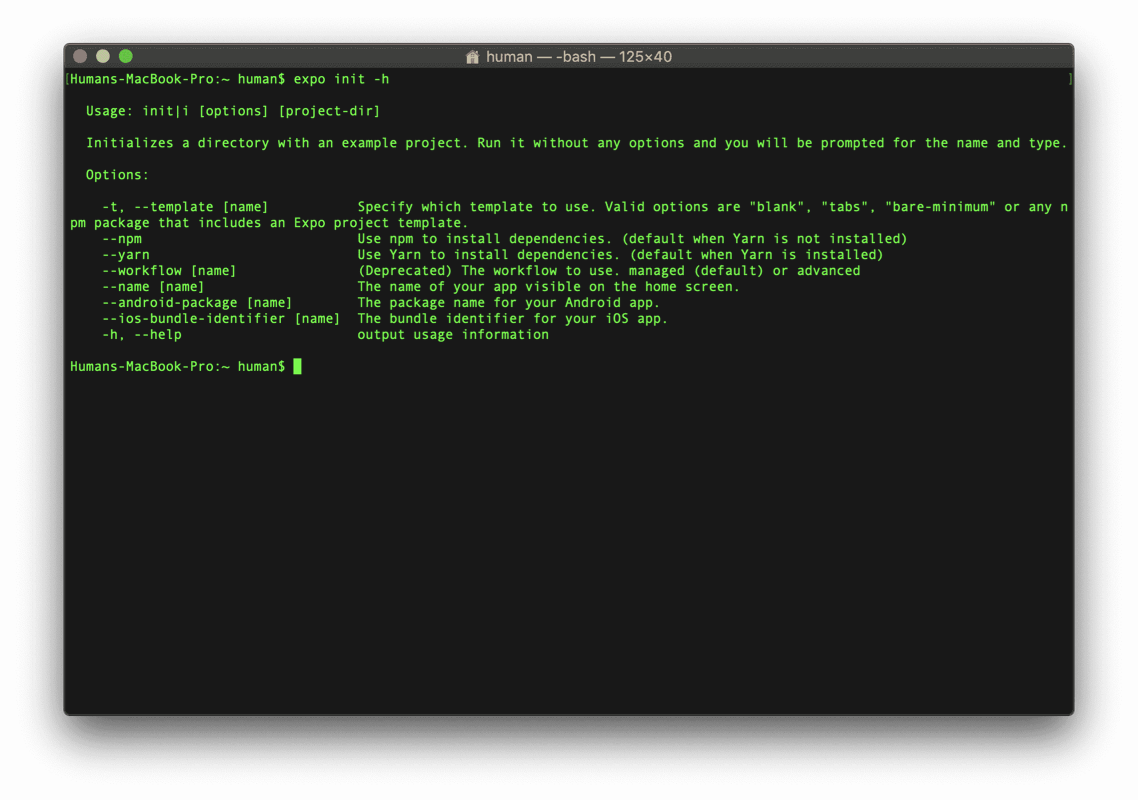
Also, you can set up the package name and bundle identifier.
- Or you can initialize a project with TypeScript support.
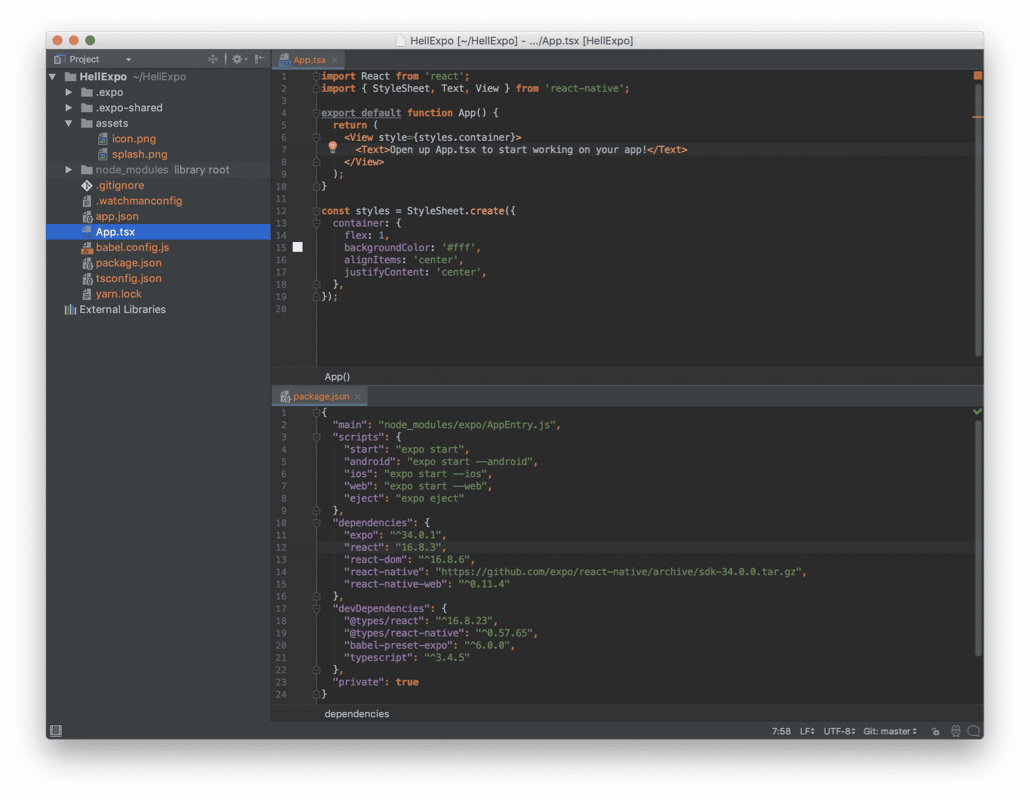
Once you have completed the initialization, you can start the development process. Also, you can run your app using the “yarn start” command — it will start bundler and the Expo server. You will see the Expo Developer Tools windows.
Now you need to press “I” to run the application on iOS Simulator. Starting a project has never been so easy.
Expo SDK
If you want to use an intricate library in your Expo project, be ready to face some support problems, but with the Expo SDK, you wouldn’t want to go back to ReactNative.
The Expo SDK is a set of integrated libraries that provides access to devices’ native features and native iOS and Android APIs. Thus, you can easily make use of device functionality. You can manage push notifications and have access to the camera, speakers, GPS, contacts, and others. To find more information,visit Expo API Documentation page.
You can use more than 80 APIs once you have installed Expo with the help of yarn/npm/expo commands without closing bundler. This will definitely speed your development process.
To start your app project, in most cases, you will need several essential features which are used for:
- SplashScreen — making a splash screen which is shown on a device when an app is launching
- AppLoading — loading assets, fonts, etc., and to keep the loading screen open
- Localization — managing l10n (localization) and i18n (internationalization) of your application
- ImagePicker/ImageManipulator — opening, editing a device’s images or videos or taking a photo
- MapView — using Apple Maps or Google Maps
- Sharing — sharing data between applications in the device
- SecureStore — persisting data to the storage on the device
You will be able to use other useful features for:
- AppAuth, AuthSession — adding authentication via OAuth
- BlurView — making a blur view effect
- Camera — capturing a photo or video using a front or back camera of the device
- Haptics — providing vibration for Android and use Haptic Engine for iOS Devices
- KeepAwake — keeping the screen from sleeping while a user is working with a part of the app
- ScreenOrientation — detecting and handling changes of the screen rotation
Besides, Expo supports some extra features like:
- Notifications — to manage push notifications (this feature works through the Expo Push service)
- Branch — to integrate branch.io
- Admob — to enable Google AdMob SDK
- FacebookAds — to integrate Facebook Audience SDK
- Amplitude — to excess to Amplitude mobile analytics
Also, you will have access to the next intricate features:
- ART — is used for graphics with the help of SVG
- Audio — for playing and recording sounds
- AV — for playing video and audio content
- BackgroundFetch — for running background tasks
- Brightness — is used for managing brightness
- Payments — the support of payments through Stripe for Android and ApplePay or AndroidPay
Easy Upgrading
Developers who are facing problems with ReactNative upgrading to version 59 know that the process can be quite tricky. There is no guarantee that all modules will work correctly and have no bugs. However, with the Expo SDK 33 version that supports Android X64, the upgrade is quite manageable as it includes only updates of a few JavaScript libraries.
You need to upgrade your libraries in the package.json file and continue the development process without any delay.
Easy Publishing
When your application is ready to hit the market, there won’t be any difficulties for you to publish it on app stores.
There are several options to publish an application:
- The Build Command
expo build:[ios|android]
To run this command, you do not need to have a powerful PC or laptop as it initiates on the server. Also, it won’t be a problem if you use Windows as there is no need for Xcode.
On the screenshot, you can see that the build is queued, and you can close the terminal without any hesitation.
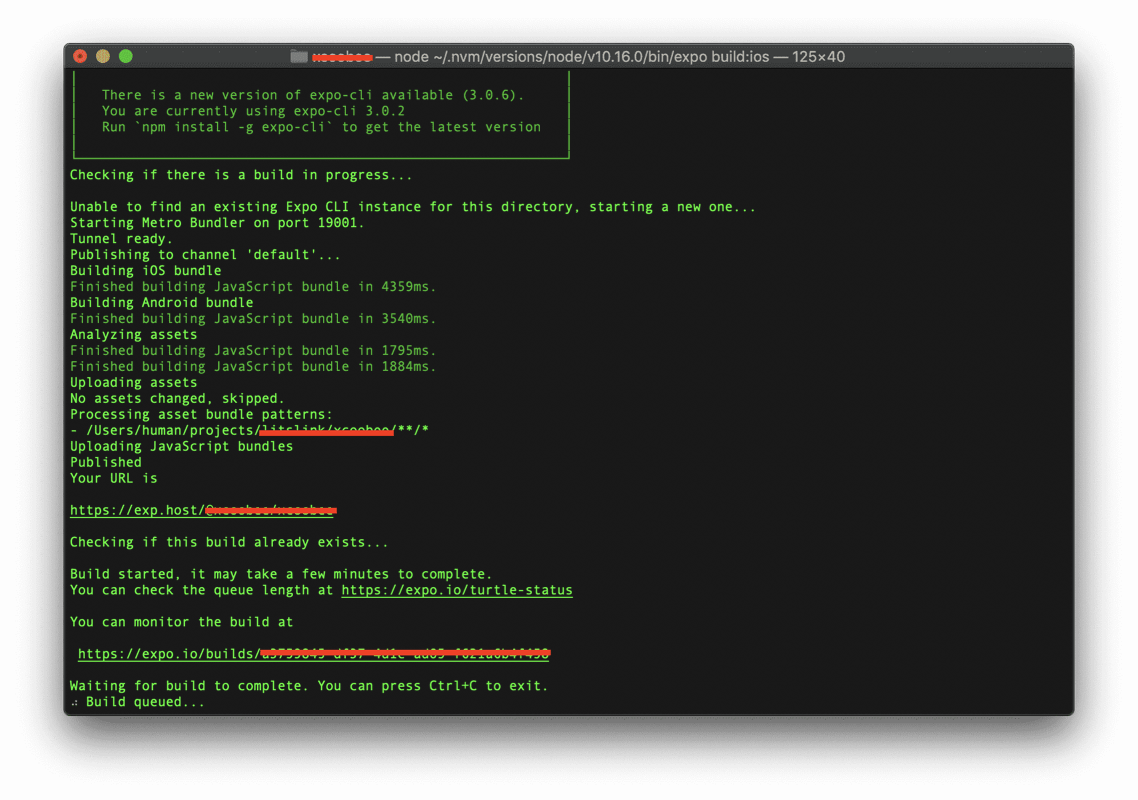
Visit the link below the text “You can monitor the build at” to check the status of the build. There you will find a download button that will be active after the build is successfully finished. You can also leave the terminal open and wait until you receive a direct link to download the bundle.
- OTA (Over The Air)
There is no need to use a framework like CodePush to implement Over-The-Air as Expo already supports it. It works by default when you publish the JS bundle via expo publish Expo in a specific release channel. Also, you can configure it in the app.json. In case you want to manage the updating process, you will probably need to use Updates API.
- Upload to Stores
The best way to upload your application to app stores is to configure Expo to do that with the help of the expo upload:[ios|android] command.
Conclusion
Nowadays, Expo is becoming more popular with users throughout the world. The platform has regular updates with bug-fixing and new features. Moreover, the development process has become much easier and faster than that of ReactNative. Expo is a great tool that helps you build appealing and top-quality cross-platform applications.